While that worked in the XP days, the OS has evolved, and there are many ways to do it.
Windows 11 Safe Mode
Update: You can also start the new Windows 11 in Safe Mode, here’s how.
Safe Mode via Advanced Boot Options
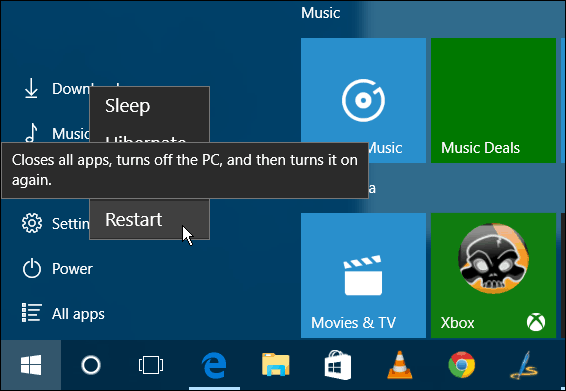
If you’re having problems booting into Windows 10 or it keeps crashing on you, the easy way to get into Safe Mode is to use Advanced Boot Options. And this is where your Windows 10 USB Recovery Drive comes in handy. You have created one. Right? Or, you can hold down the Shift Key and, at the same time, click Restart.
Either way, when your PC comes back, you’ll see the Advanced Options menu. Go to Troubleshoot > Advanced Options and select Startup Settings.
On the next screen, select the Restart button.
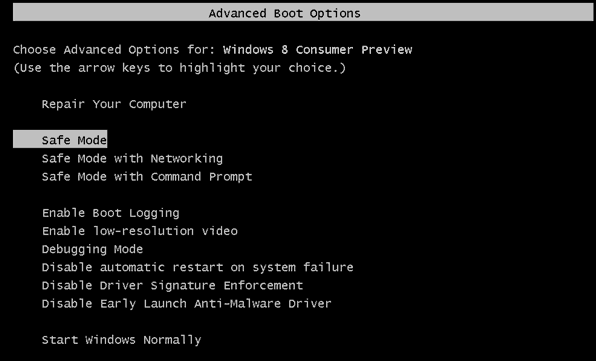
When it comes back, you will see the familiar Advanced Boot Options screen and can choose the version of Safe Mode you want, i.e., with networking or not.
Boot into Safe Mode While Inside Windows 10
If the problem you’re having still allows you to get into the OS, hit the Windows Key+R to open the Run box or in the Search field type: msconfig and hit Enter.
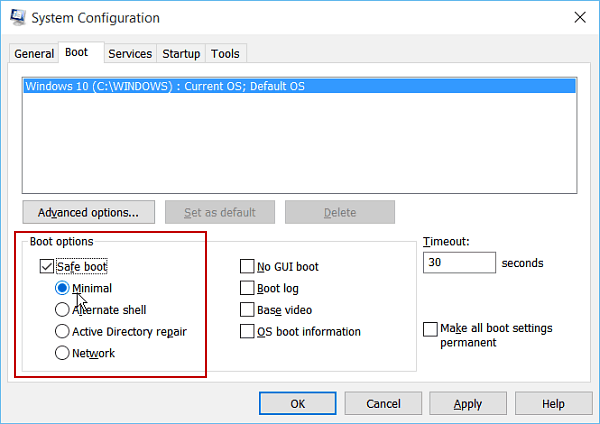
Next, in the System Configuration window, select the Boot tab.
Then under Boot Options, check the Safe Boot box and one of four options which are explained below:
Minimal: Safe Mode without a network connection (typically best for home users)Alternate Shell: Safe Mode with the Command Prompt (advanced power user option)Active Directory Repair: This is for restoring a server Domain Controller (home users don’t need to worry about this one)Network: Safe Mode with a network connection (allows you to reach the internet and other devices on your network)
Restart your computer, and it goes into Safe Mode automatically – no need to press any keys. Then while in Safe Mode, you can use the administrative utilities from the hidden Quick Access menu for troubleshooting.
Ensure that once you’re done with Safe Mode, go back into System Configuration and uncheck Safe Boot. Otherwise, you’ll be booting into Safe Mode every time you restart. Note that you can use these options to boot Windows 8.1 into Safe Mode, too. When the command prompt opens, run the following: bcdedit /set {default} bootmenupolicy legacy That’s really all there is to it. Now, when your computer boots up, you can mash the F8 key to view the classic Advanced Boot Options. If you want to return the boot menu back to normal, you can use this command: bcdedit /set {default} bootmenupolicy standard Comment Name * Email *
Δ Save my name and email and send me emails as new comments are made to this post.


![]()
