Sometimes, however, you might not want people to see the contents of your notes. Maybe you’re making a list for a surprise party, or you’ve made a note of sensitive information such as someone’s bank details. If so, it’s possible to lock your notes. Locking your notes means that no one can open them without the correct password. For quick access, you can also set up Face ID or Touch ID to unlock your notes. You can lock your notes on iPhone, iPad, or Mac, and if you lock a note on one device, it will be locked on any other Apple device signed in to the same Apple ID. If you like the idea of keeping the contents of your notes safe, then read on to learn how to lock Apple Notes on your iPhone, iPad, and Mac.
Not All Apple Notes Can be Locked
There are some instances where you will not be able to lock Apple notes. Text notes and notes containing photos can be locked, but other types of attachments can stop your note from being lockable. You will not be able to lock notes containing any of the following:
PDFsAudioVideoKeynote documentsPages documentsNumbers documents
You are also unable to lock notes that are shared with other collaborators through iCloud or notes that sync between accounts.
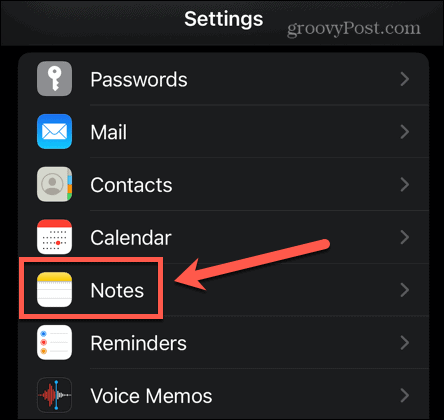
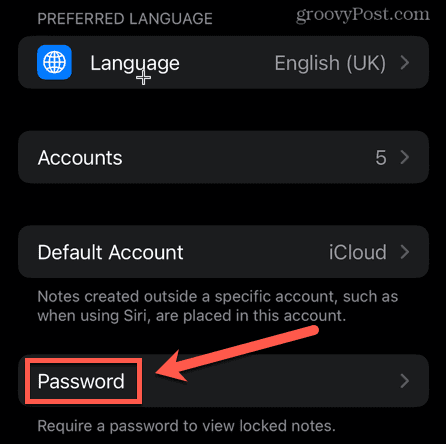
How to Create a Password for Locked Notes on iPhone and iPad
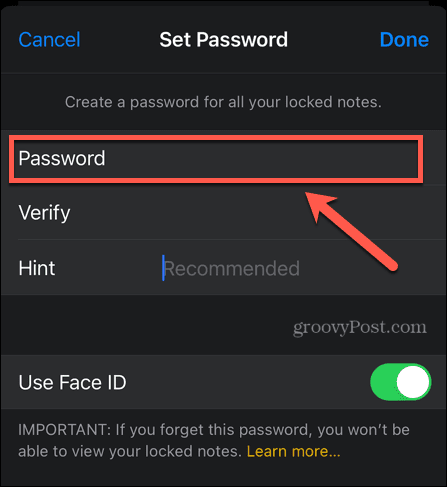
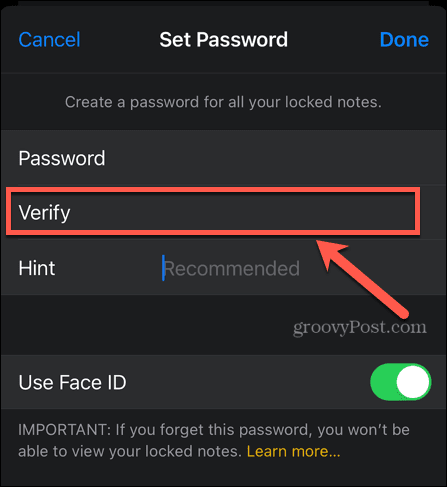
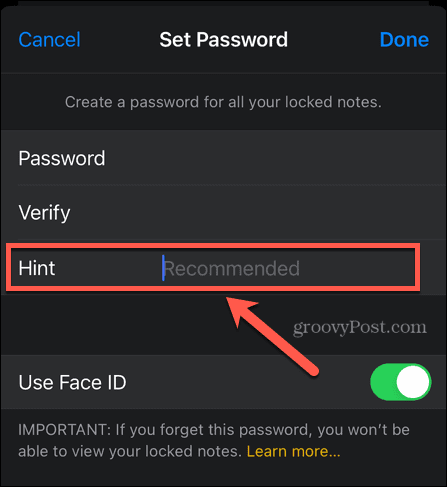
To lock and unlock notes, you need a password. With compatible devices, you can set up Face ID or Touch ID to unlock your notes, but you will still need to set up a password first. The first time you try to lock a note, you will be prompted to create a password if you haven’t already set one up. If you would prefer to set up your password first, you can do so through the Settings app. To create a password to lock notes on iPhone and iPad: It is highly recommended to set a hint for your password that will help to remind you of it should you forget. That’s because if you forget your password, you will not be able to access any notes locked with that password. It is possible to reset your password, but this will only generate a new password that is applicable to all future notes; it won’t reset the password for any existing locked notes.
How to Lock Apple Notes on iPhone and iPad
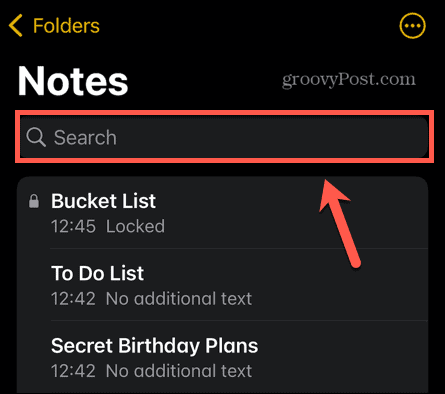
In earlier versions of iOS, it was possible to lock multiple Apple notes at once. This is no longer possible; if you want to lock multiple notes, you’ll need to lock them individually. The good news is that once you’ve entered your password to lock a note, you don’t need to re-enter it during the same session. You can lock as many additional notes as you wish without having to type your password in again. One important thing to note: the name of your notes will still be visible in the Notes app, even for locked notes. If there is anything you want to keep hidden, make sure that it does not appear in the names of any of your notes, as this information will be visible to anyone using your device. To lock an individual note on iPhone and iPad:
How to Open a Locked Apple Note on iPhone and iPad
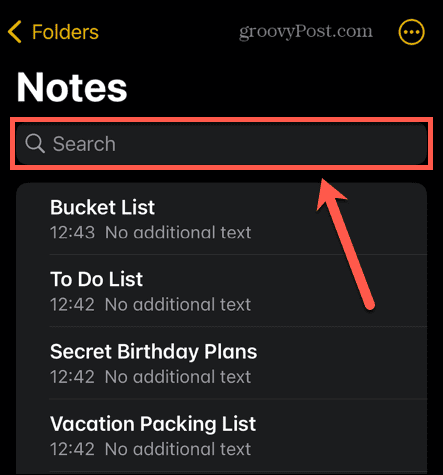
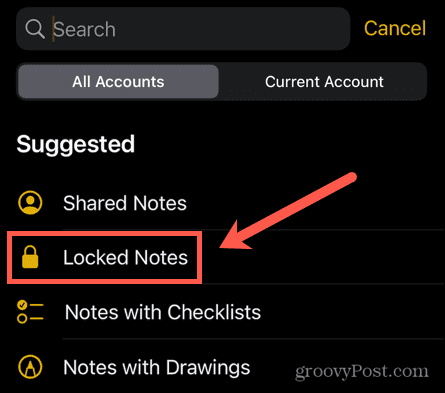
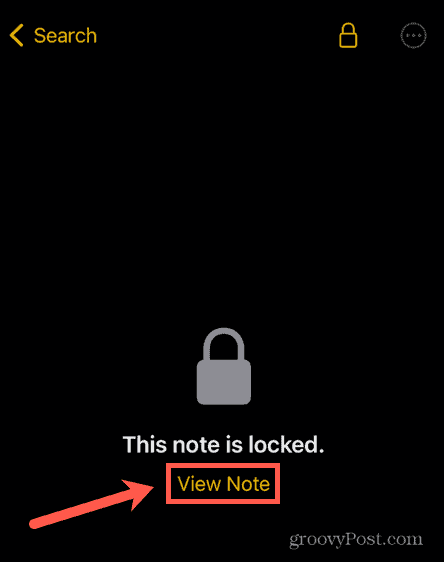
If you’ve locked Apple notes, no one will be able to see them without your password. To access your notes again, you’ll need to unlock them. All other notes locked with the same password will be unlocked when you unlock an individual note. This saves you from having to keep unlocking each note you want to view. Your notes will all remain unlocked until you lock one of them again or you lock your device. To open a locked note on iPhone and iPad:
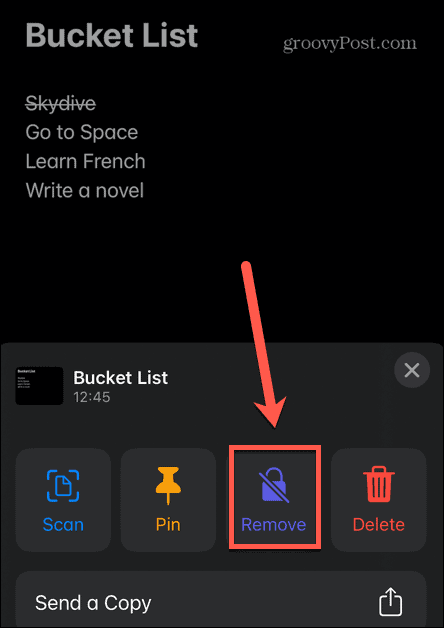
How to Remove a Lock on an Apple Note on iPhone and iPad
If you decide that you no longer want a note to be locked, you can completely remove the lock from it. Removing the lock ensures that you can access the note even when other notes are locked. You can add and remove locks to notes as many times as you wish. When you remove a lock from a note, that lock is removed on all devices that are signed in to the same Apple ID. To remove a lock on a note on iPhone and iPad:
How to Change the Password for Locked Apple Notes on iPhone and iPad
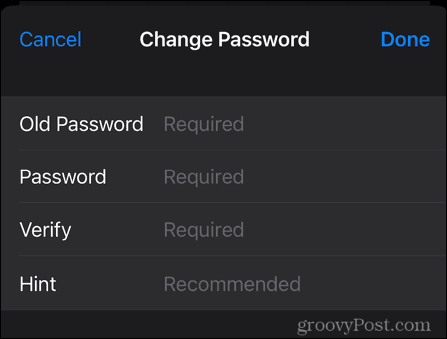
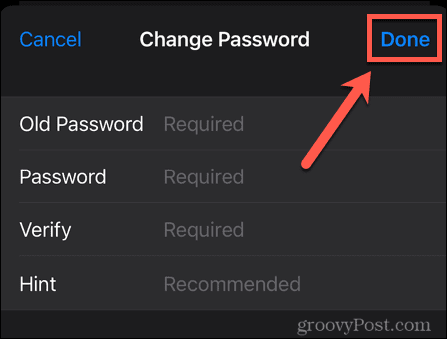
If you’re worried that your password has been compromised, or you just want to change it, you can change the password for your locked notes. Changing the password for one note will cause it to change for any other notes that use the same password. You need to know your current password in order to change it to a new one. To change the password for locked notes on iPhone and iPad:
How to Reset your Notes Password on iPhone and iPad
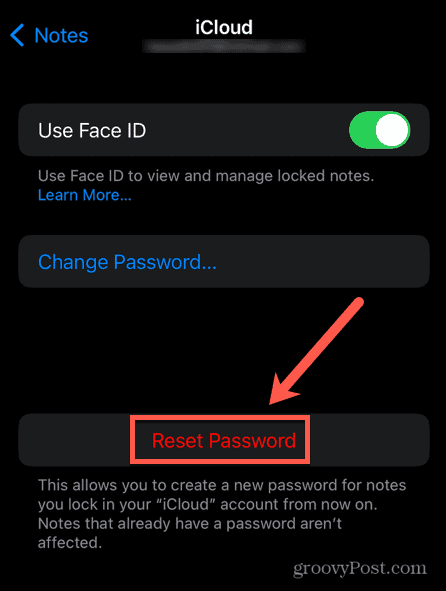
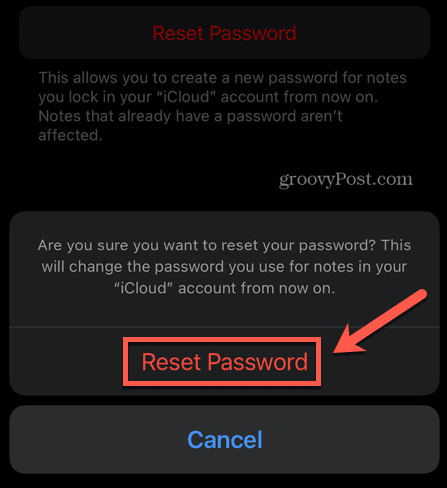
If you completely forget your password, and the hint doesn’t help you remember it, then it is possible to reset your Notes password. However, this new password will only be valid for any notes you lock going forward. You won’t be able to access any old notes as they will still keep their old password. That’s why resetting your Notes password should only be used as a last resort; doing so will mean having multiple different passwords locking different notes. There’s no way to tell which notes are locked with the old password and which with the new password, so things can soon get very confusing. If you try to open a note locked with the old password by using your new password, you’ll see a hint for your old password. If you do manage to remember it, you will be given the option to update the password to the new version so that all of your notes are using the same password. To reset your Notes password on iPhone and iPad:
How to Create a Password for Locked Apple Notes on Mac
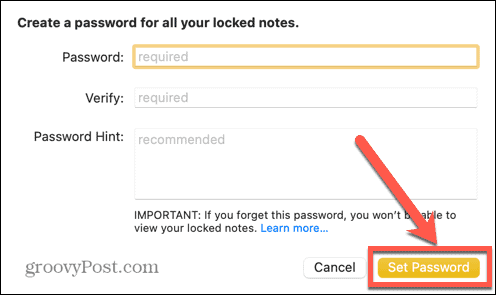
You can also use the Notes app on your Mac to lock Apple notes. If you haven’t upgraded your iCloud notes, you’ll see an Upgrade button next to your iCloud notes folder in the Notes app. You’ll need to click this and follow the instructions in order to be able to lock your notes on Mac. You can’t use Face ID to unlock notes on Mac, but if you have Touch ID on your Mac or keyboard, you can use it to unlock notes once you’ve set up your password. As with the iPhone and iPad, if you don’t set up a password, you’ll be prompted to create one the first time to try to lock a note, but you might prefer to get this step out of the way first. To create a password for Notes on Mac:
How to Lock Apple Notes on Mac
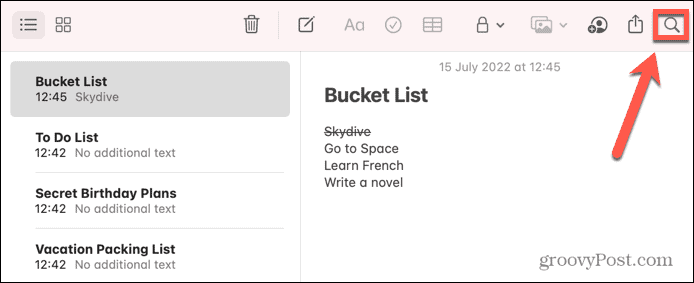
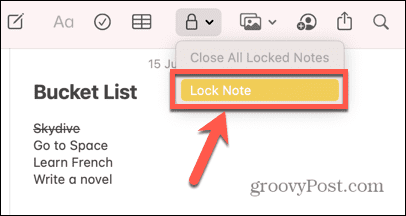
Once you’ve set up your password, you’re ready to lock Apple notes on your Mac. There’s no way to lock all of your notes at once; you’ll need to lock them individually. However, once you’ve entered your password to lock the first note, you won’t need to keep entering it to lock any other notes. To lock individual notes on Mac:
How to Open a Locked Note on Mac
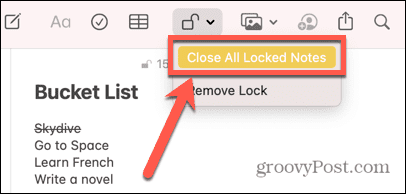
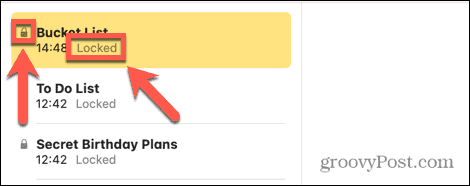
Now that your notes are locked, no one can access them without the correct password. To see the contents of a locked note, you’ll need to unlock it again. Unlocking one note unlocks all other notes that use the same password. These notes will stay unlocked until you manually lock a note, you close the app, or after a period of inactivity. To open a locked note on Mac:
How to Remove a Lock on a Note on Mac
If you don’t want a note to be locked anymore, you can remove the lock. This ensures that you can access the note at all times, even when other notes are locked. To remove the lock from a note on Mac:
How to Change the Password for Locked Apple Notes on Mac
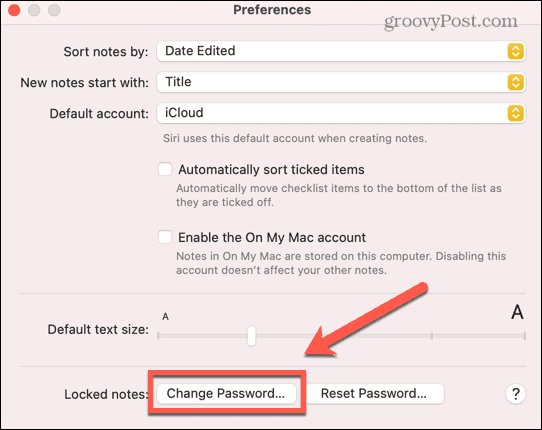
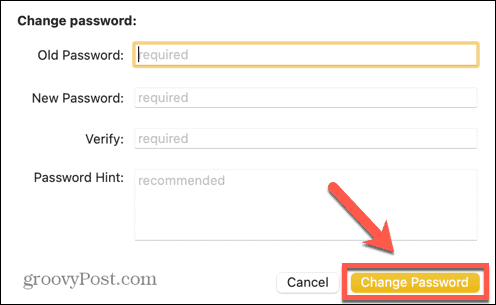
If you want to change the password for locking Apple notes on Mac, you can do so as long as you know the current password. If you can’t remember the current password, your only option is to reset it, which you can read more about in the next section. When your iCloud and On My Mac accounts are set to the same password, changing your iCloud password will also automatically change the password for your On My Mac notes. To change the password for your lock notes on Mac:
How to Reset your Notes Password on Mac
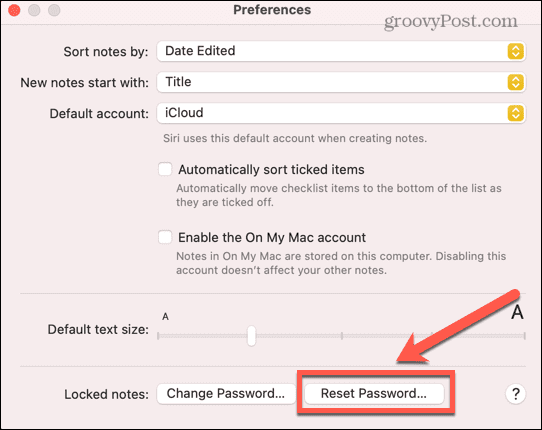
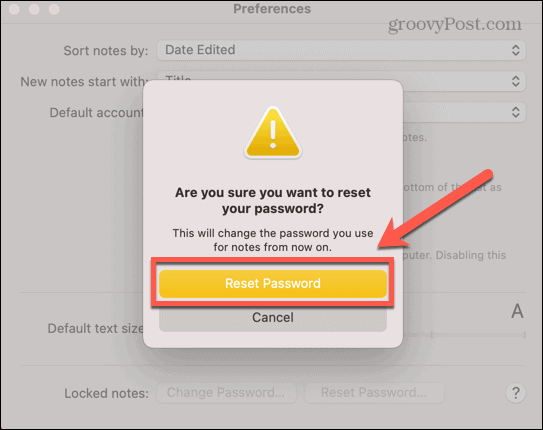
If you can’t remember your password, you can reset it. This won’t allow you to access any currently locked notes, however. You will only be able to use the new password to lock notes moving forward. Any currently locked notes will still keep their current password, and if you can’t remember it, you won’t be able to unlock them. Resetting your Notes password can lead to having notes locked with multiple different passwords, so it should only be used as a last resort. To reset your Notes password on Mac:
Keep Your Information Safe From Prying Eyes
Knowing how to lock Apple Notes on your iPhone, iPad, and Mac ensures that any information you want to keep private remains private. It’s a quick and easy way to ensure that even if someone has your device, they can’t see what you don’t want them to see. If you have photos that you want to keep hidden, you can add them to your Hidden album. However, anyone can access this album if they know where to look. If you want to be sure that people don’t see certain photos, you can use the Notes app to lock your photos on iPhone. If you want to keep your browsing private, you can also use iCloud Private Relay which is included as part of iCloud Plus. For your desktop, it’s possible to encrypt your files and folders on Mac so that they can only be accessed with a password. Comment Name * Email *
Δ Save my name and email and send me emails as new comments are made to this post.


![]()


![]()
![]()


![]()


![]()


![]()
