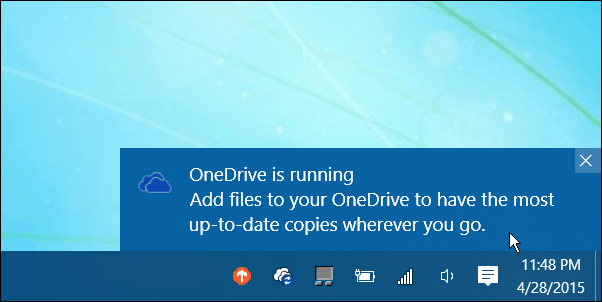
In Windows 10, these notifications are part of the new Action Center, a centralized location for managing incoming notifications. By default, notifications will pop up for a few quick seconds then disappear. Instead of breaking your current activity to review that notification in detail, you can configure notifications to appear a little bit longer on screen.
Display Notifications for Longer Time in Windows 10
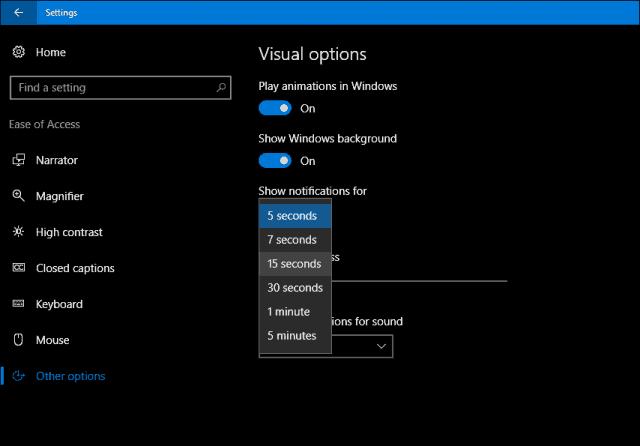
Click Start > Settings > Ease of Access > Other options. Click on the “Show notifications for” list box, then choose an appropriate time interval. You can choose from 5 seconds, 7 seconds, 15 seconds, 30 seconds, 1 minute, or 5 minutes. That’s it; your notifications will no longer be quite as fleeting. If you set a long notification display time, like 30 seconds or more, you can dismiss notifications by clicking the X in the top-right.
If you want to make further adjustments to your notification behavior, check out our previous article for instructions. Another related system-wide setting you should check out too is managing autoplay settings. This lets you control the behavior when connecting removable storage devices such as a USB thumb drive or inserting an optical disc. For more Windows 10 Action Center tweaks, check out the articles linked below.
Customize Taskbar Settings in Windows 10 Anniversary UpdateHow to Manage Windows 10 App NotificationsHow to Configure and Use Action Center in Windows 10How to Change or Turn Off Notification SoundsHow to Disable Action Center in Windows 10
Comment Name * Email *
Δ Save my name and email and send me emails as new comments are made to this post.


![]()
