If you’ve enabled virtualization in Windows 11, you should be able to create a virtual machine using the Hyper-V Manager. Here’s how.
Create a Virtual Machine in Windows 11
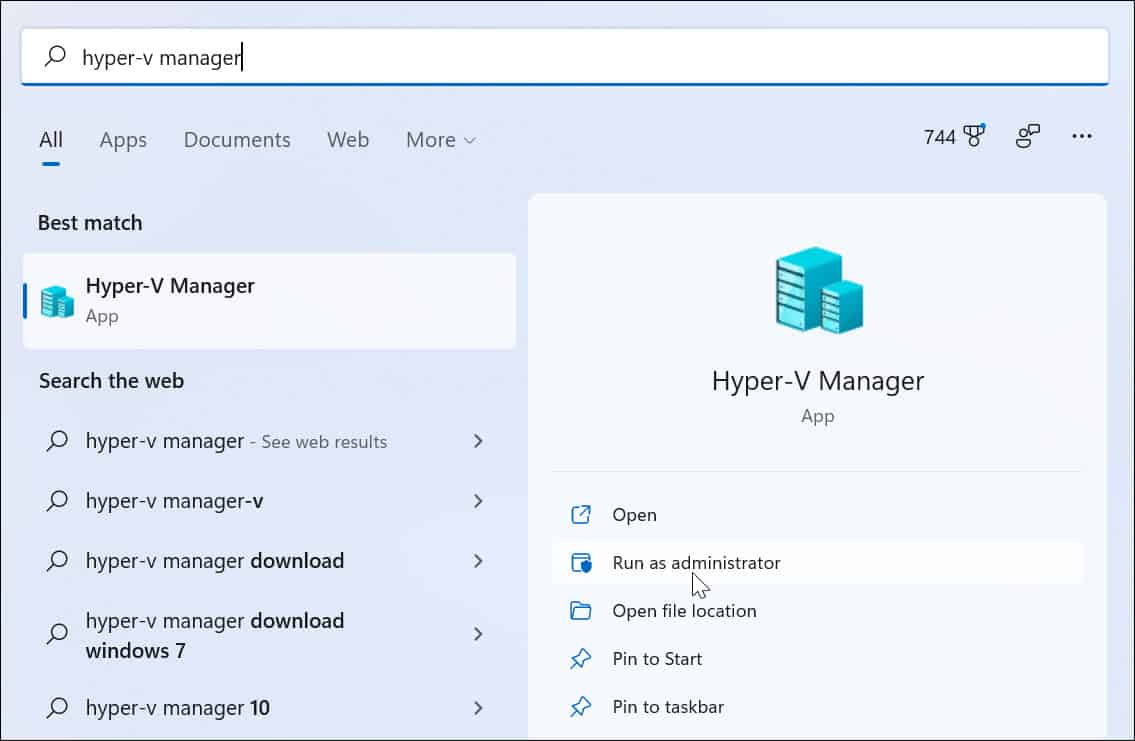
Before you begin, make sure virtualization is enabled in your PC’s BIOS/UEFI settings. You’ll also need a PC that is capable of virtualization and has the necessary system resources. To get started, press Start or hit the Windows key on your keyboard. In the Start menu, type hyper-v manager. Press the first result (best match) from the search results at the top.
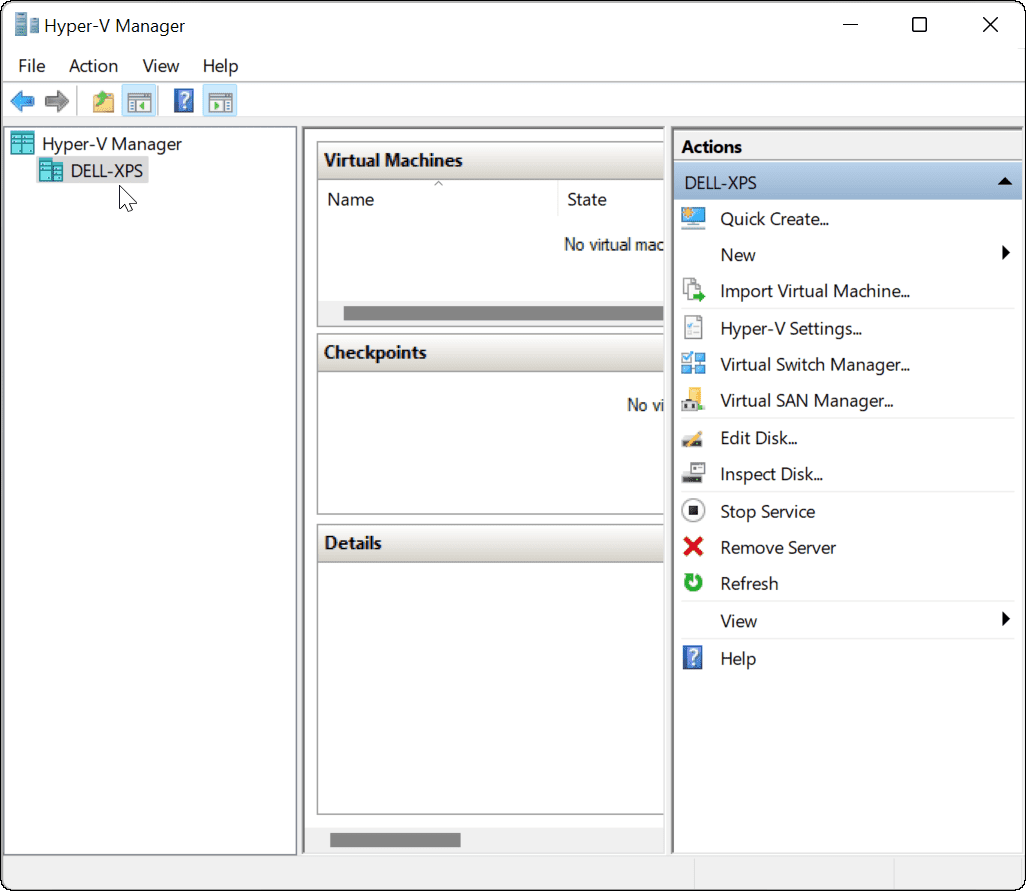
When Hyper-V Manager opens, select your PC’s hostname from the column on the left.
That opens the “Actions” panel on the right. From here, press New > Virtual Machine.
The “New Virtual Machine Wizard” will start. The first screen is a fundamental message letting you know what it’s for. It’s general information and doesn’t affect your VM. If you don’t want to see this message each time you create a VM, click “Do not show this page again” and click Next.
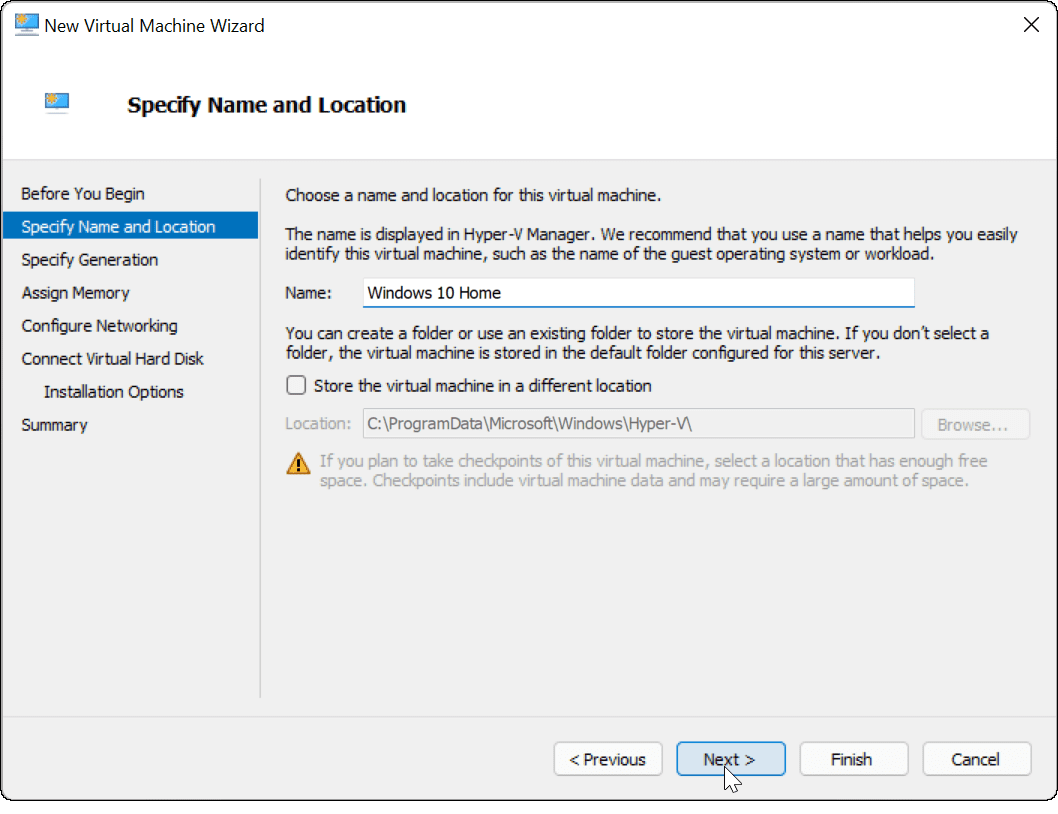
You’ll need to give your virtual machine a name that allows you to identify it easily. For example, you may decide to use the name of the operating system, but you can use whatever name you want. You’ll also need to choose where you’d like to store your virtual machine. By default, Windows will select the local C drive—your Windows installation drive. If you’re lacking in space, you can change this to use a separate partition, external drive, or network location instead. Press Next when you’re ready to continue.
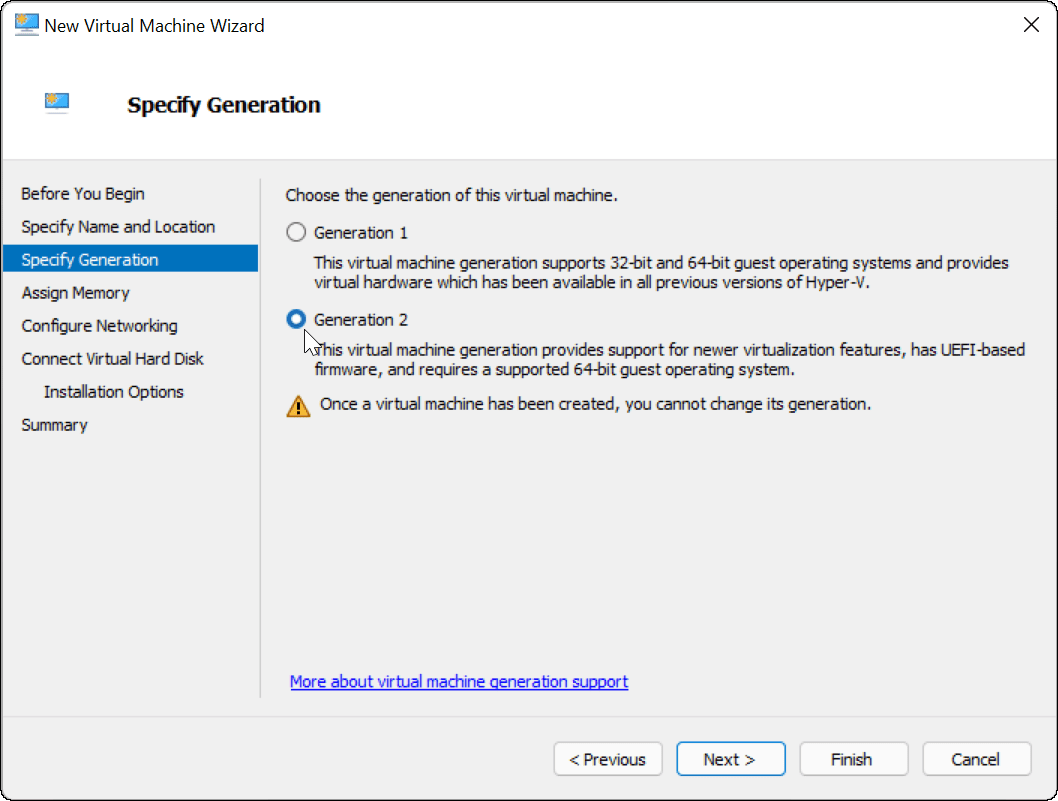
Next, you’ll need to specify the generation of the VM. Generation 1 is typically for legacy 32-bit operating systems that support older apps. A Generation 2 machine supports new virtualization features. For example, it uses a UEFI bootloader and supports modern 64-bit operating systems. Generally, if you want to run Windows 8 or higher on your virtual machine, select Generation 2. Press Next to continue.
Assign the amount of system memory (RAM) you want your virtual machine to use. You’ll need to check the minimum amount required for your operating system to run—it’s usually a good idea to provide more than this, however. You’ll need to check your PC’s system resources to confirm whether or not you’re able to do this. Assigning too much can slow down your host operating system, so try to find the right balance. You can always increase or decrease this amount later. Press Next when you’re ready to do so.
If you want your virtual machine to have network connectivity, change the connection to Default Switch. That will use your host machine’s network connection to reach your local network and get online. If you don’t want it to have network connectivity, leave the setting as Not Connected. For example, if you’re limiting your data usage on your host operating system, you may prefer to leave networking disabled. Note that you can always change the network connectivity later, too. Click Next when you’re ready.
At this point, you’ll need to create a virtual hard disk to host your virtual machine’s operating system. Select Create a virtual hard disk to do this. The name and location fields should already be populated, but you can customize the size you want the drive to be here. This will take up space on your physical hard drive, so make sure to adjust the size accordingly. If you have an existing virtual hard drive from a previous virtual machine, you can select to use this here. Click Next to proceed to the next stage.
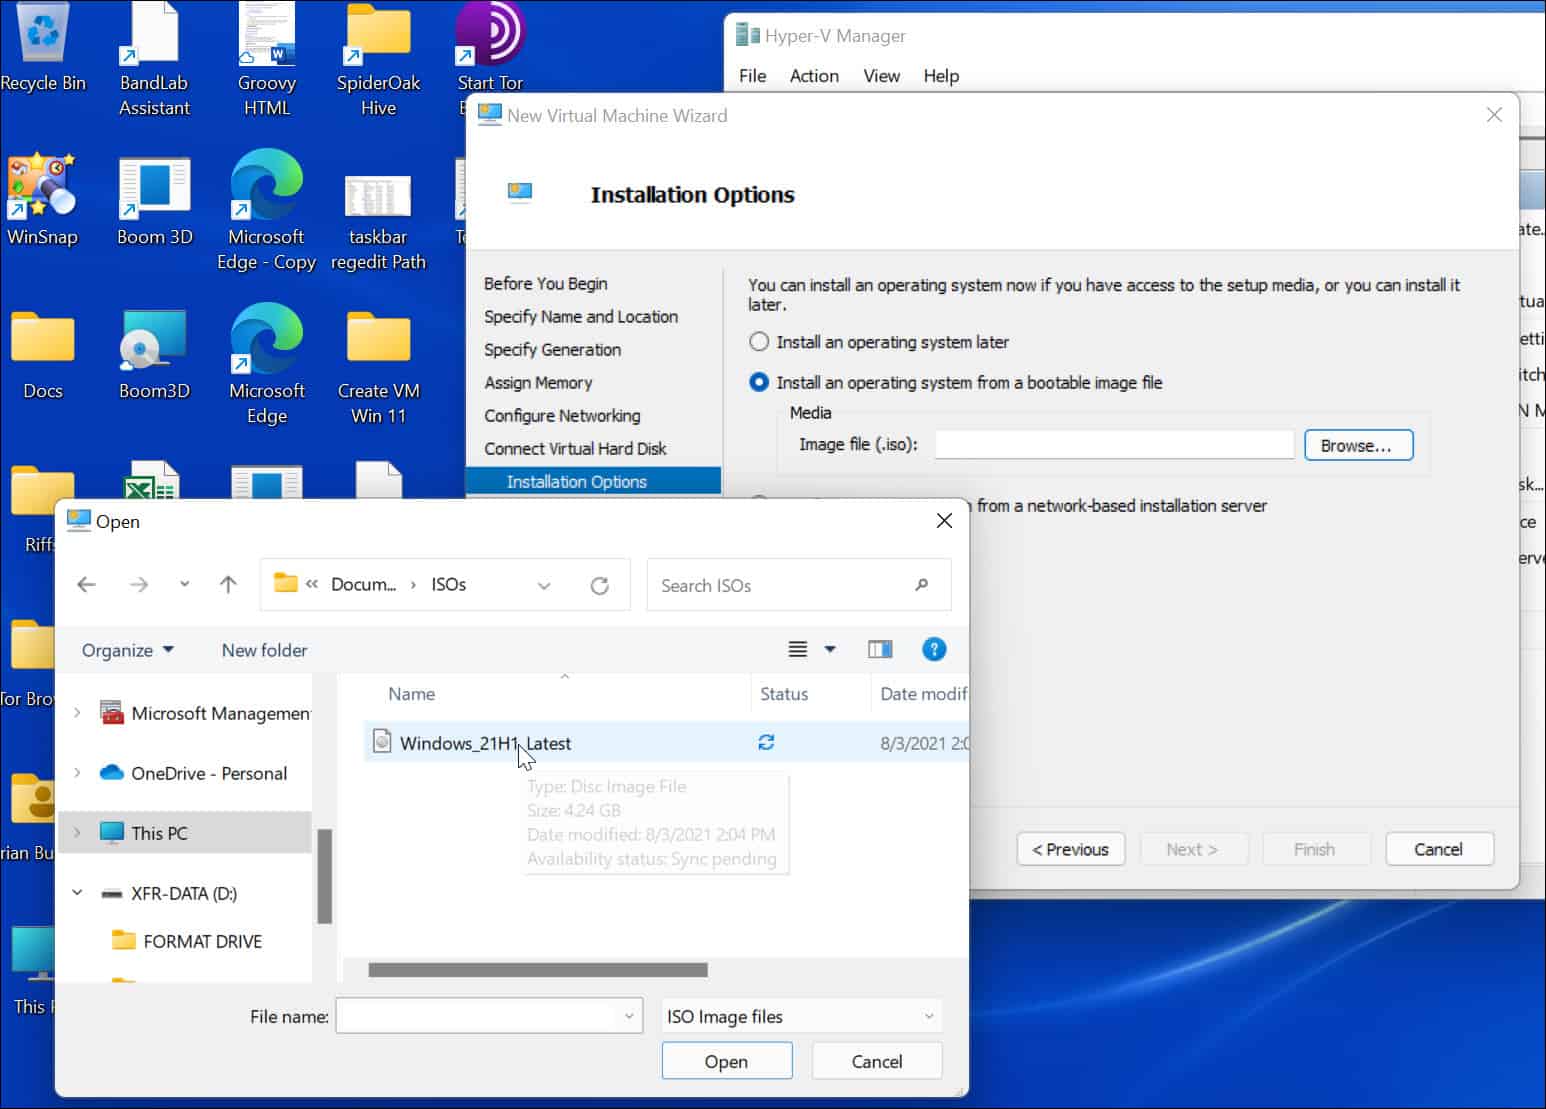
In the Installation Options menu, you can select the installation media you want to use. If you’re planning on installing Windows 10 or 11 as a virtual machine, for example, you can download the file you’ll need (in the ISO format) from the Microsoft website. You can also use the installation files from a CD, DVD, USB drive, or another storage location.
When you click Next at this point, you should see a basic summary of the virtual machine details you’ve selected. If everything looks good, click Finish. If you made a mistake or need to double-check on something, click Previous and make adjustments.
Install the OS on Your Virtual Machine
Once you have everything set up, it’s time to install the operating system on your VM. From Hyper-V Manager, right-click the VM you created and click Start.
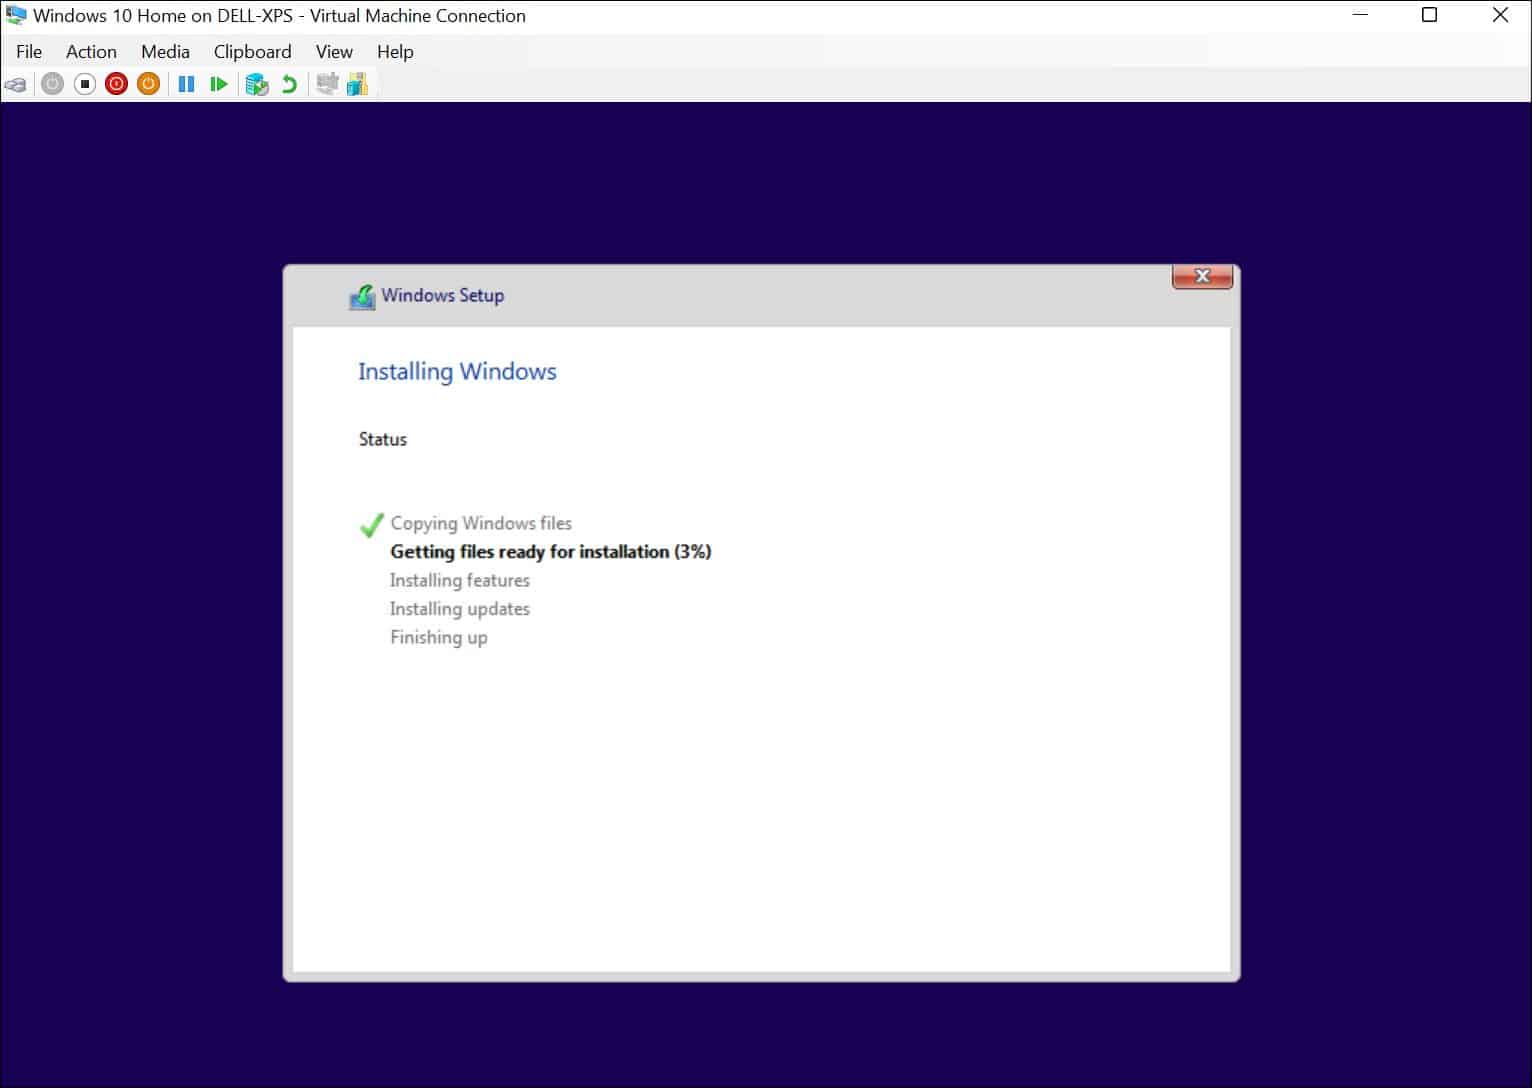
Follow the on-screen instructions to install the OS you selected as you would an actual PC. For example, in the example below, we’re installing Windows 10 as a Hyper-V virtual machine. You can also clean install Windows 11 in a VM, an older version of Windows, or even a Linux distribution.
After installation is successful, you should be able to use the installed operating system in your virtual machine like any other PC.
Configuring a Hyper-V Virtual Machine
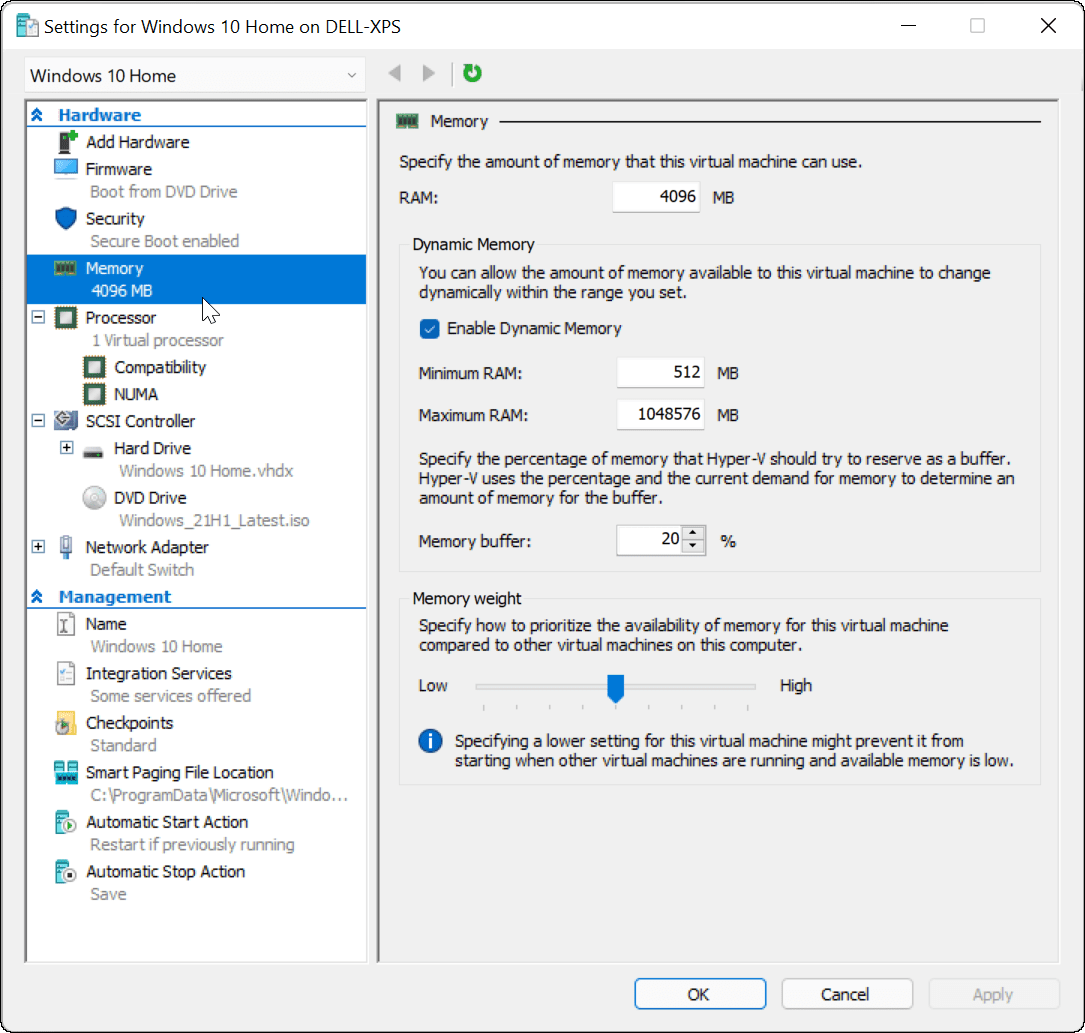
If you need to, you can configure your Hyper-V virtual machine after you’ve created it. To do this, click Settings under your virtual machine’s name.
That will bring up different virtual hardware settings to change, such as changing the available RAM settings or configuring your attached storage devices. There are also several management settings to change the virtual machine name, integrated services, paging file location, and more.
Using Hyper-V Virtual Machines in Windows 11
If you want to create a virtual machine in Windows 11, the Hyper-V Manager will get the job done. This built-in utility means you don’t need third-party software like VirtualBox, but you will need Windows 11 Pro to use it. If you’re running Windows 11 Home, you’ll need to upgrade your Windows 11 version. You can use Hyper-V VMs to test Linux distributions like Ubuntu, or run newer test builds of Windows, such as insider builds. Hyper-V is just one tool available to Windows 11 users. Comment Name * Email *
Δ Save my name and email and send me emails as new comments are made to this post.


![]()
