People have been editing videos with iMovie on Mac for over 20 years. Available for free to anyone with a Mac, iMovie was initially used primarily by amateur videographers with a digital camera. In recent years, iMovie has successfully transitioned to a world where smart devices such as the iPhone and iPad reign. Though it all, using iMovie hasn’t changed all that much.
Editing Videos With iMovie
In this article, you’ll learn about the tools required to use iMovie and its different sections. From there, we’ll take a closer look at how to edit your first video in iMovie.
What You Need
To get started, you should have the newest version of iMovie installed on your Mac. Download iMovie from the Mac App Store if it’s not currently on your computer. Additionally, make sure your Mac is updated to the latest version of macOS. If it’s not, perform an update.
Getting Started
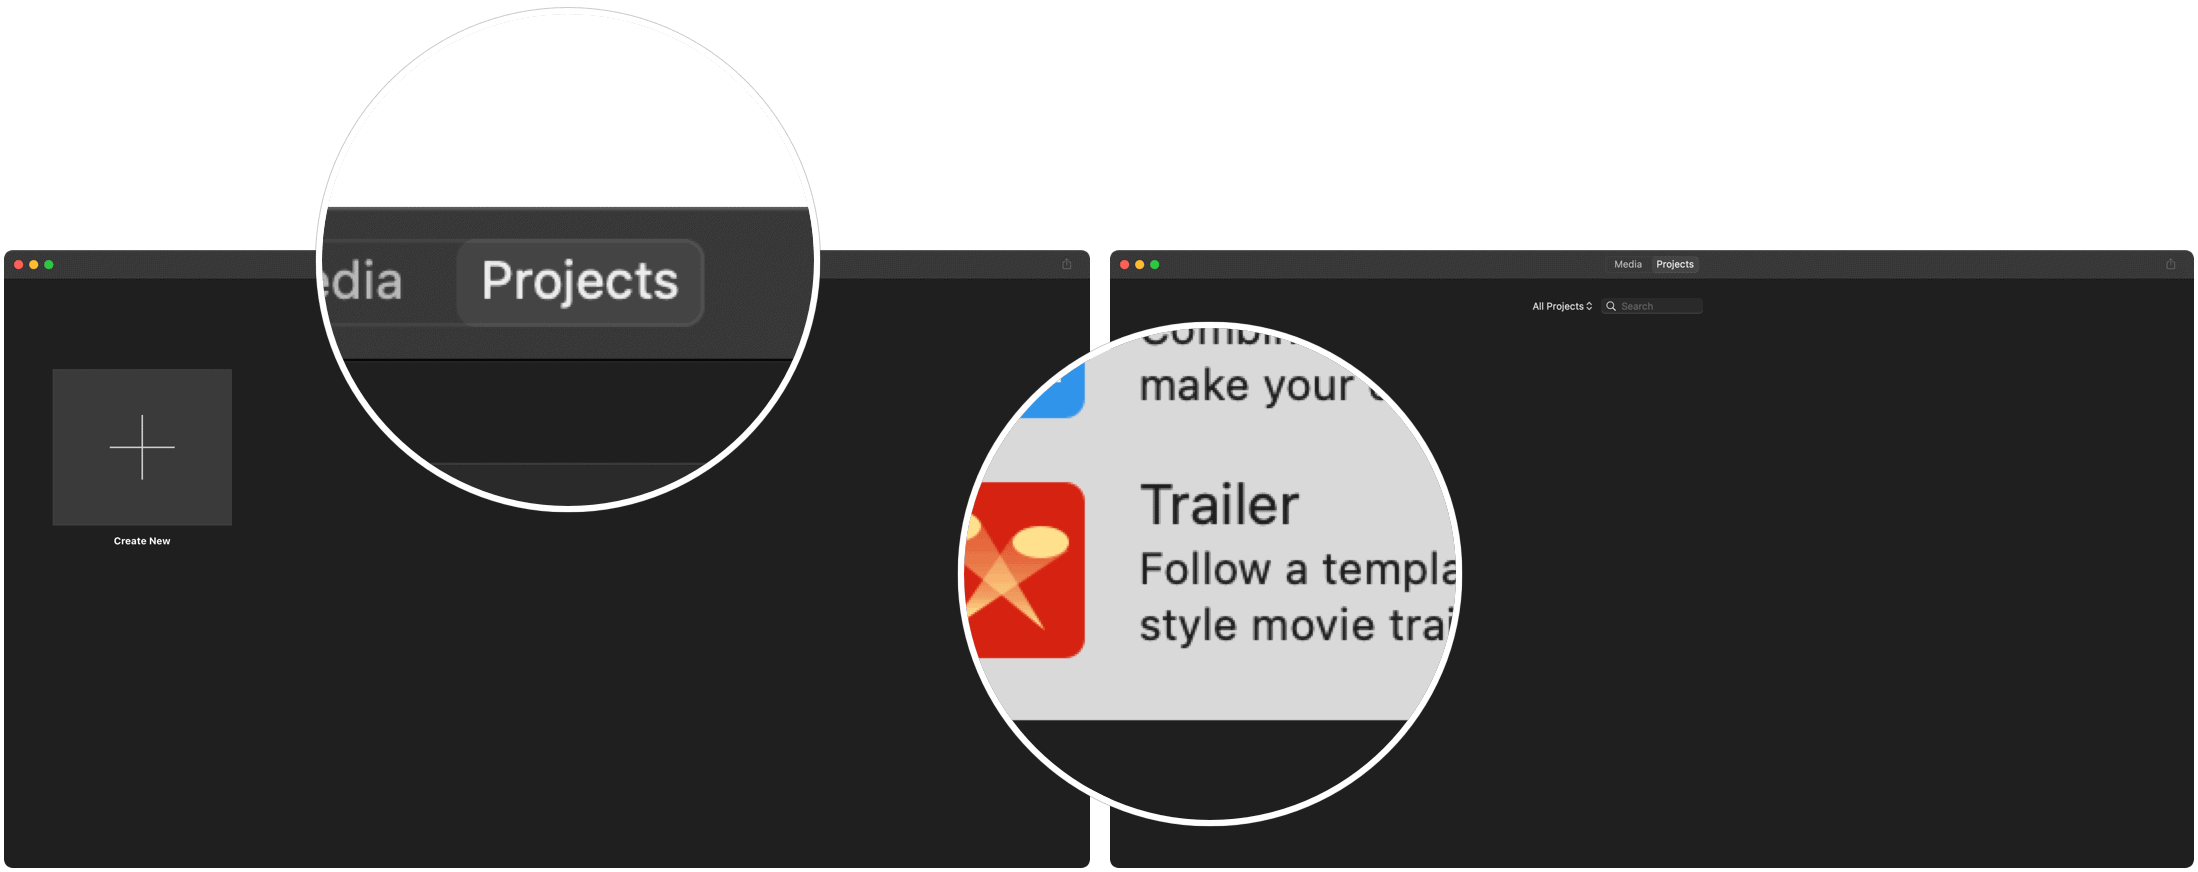
In this introduction, we’re going to import a video into iMovie. The app lets you edit movies and trailers. With the former, you can combine photos, video, and music to create a movie. The latter involves using built-in templates to create movie-like trailers. For this study, we’ll be importing a trailer. To follow along:
Next:
It’s now time to explore the different sections of iMovie.
iMovie Sections
There are four main sections to the iMovie app. First, at the top left, you’ll find your Libraries section. It’s from here where you can access any film clips stored in your Photos library or video content previously used in the app. At the bottom is the storyboard or timeline where chips get dropped from your library. Together, these clips make your movie. The Media Library is found at the top of the iMovie interface, slightly left. Clips used within your project are located here. In addition, you can see a preview of the video by clicking on it. Finally, at the top right is the Edits section. As the name suggests, it’s from here you can adjust the colors or look of a clip before adding it to your timeline.
First Steps to Editing Videos in iMovie
There’s much you can do as you create and edit content in iMovie. Among the most used features include the following.
Import Videos
To add video clips to your masterpiece:
Next: The example above assumes the video is already on your Mac or iCloud. You can also attach a compatible device to your Mac to import content, such as digital cameras, tablets, or, yes, your iPhone. When you do, the device should show on the left side of the iMovie app.
Change Your Theme
Apple’s iMovie is packed with beautiful themes that you can use to personalize your video better. When you created a trailer, you already selected a theme. However, you can add or change this at any time for both videos and trailers. To change your theme:
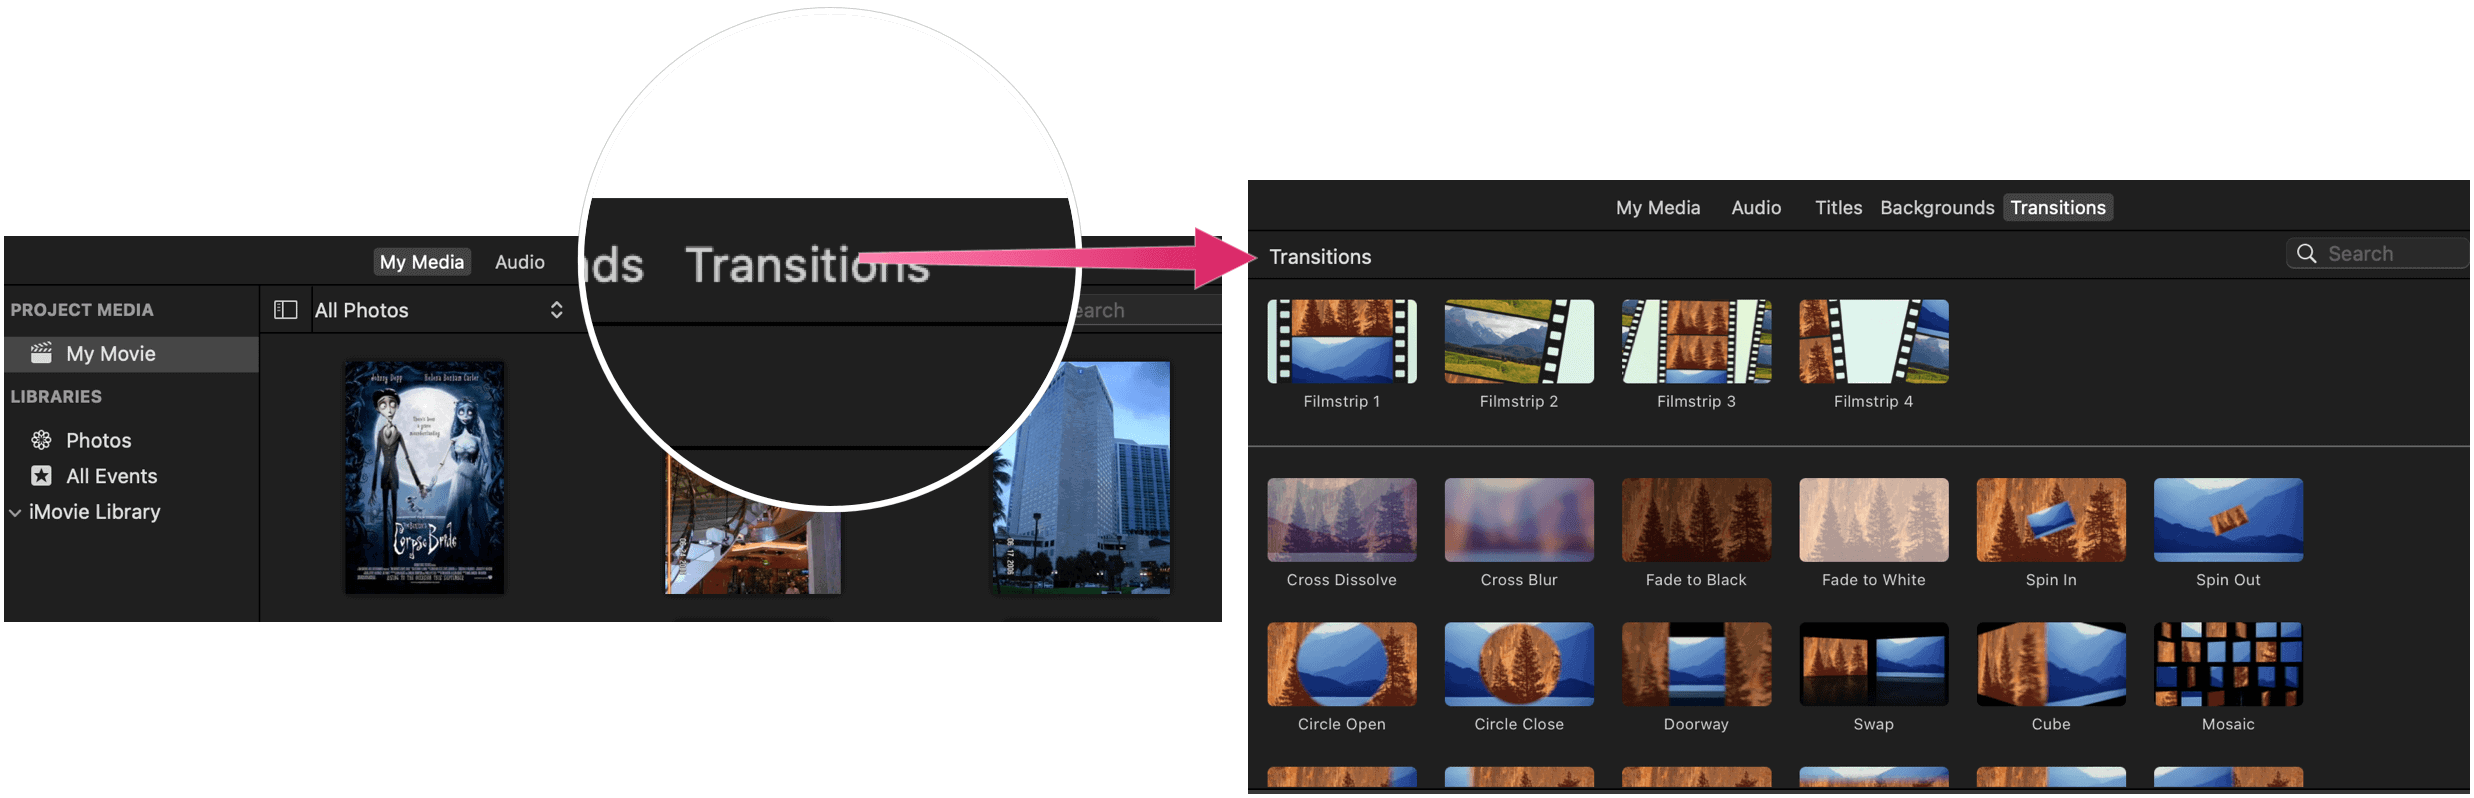
Transitions
Videos are created by adding clips. To more clearly move from one clip to another, iMovie offers a large selection of transitions. These take many forms, including cross dissolve, swap, doorway, mosaic, among others. To add a transition, make sure you have two or more clips on your timeline. From there:
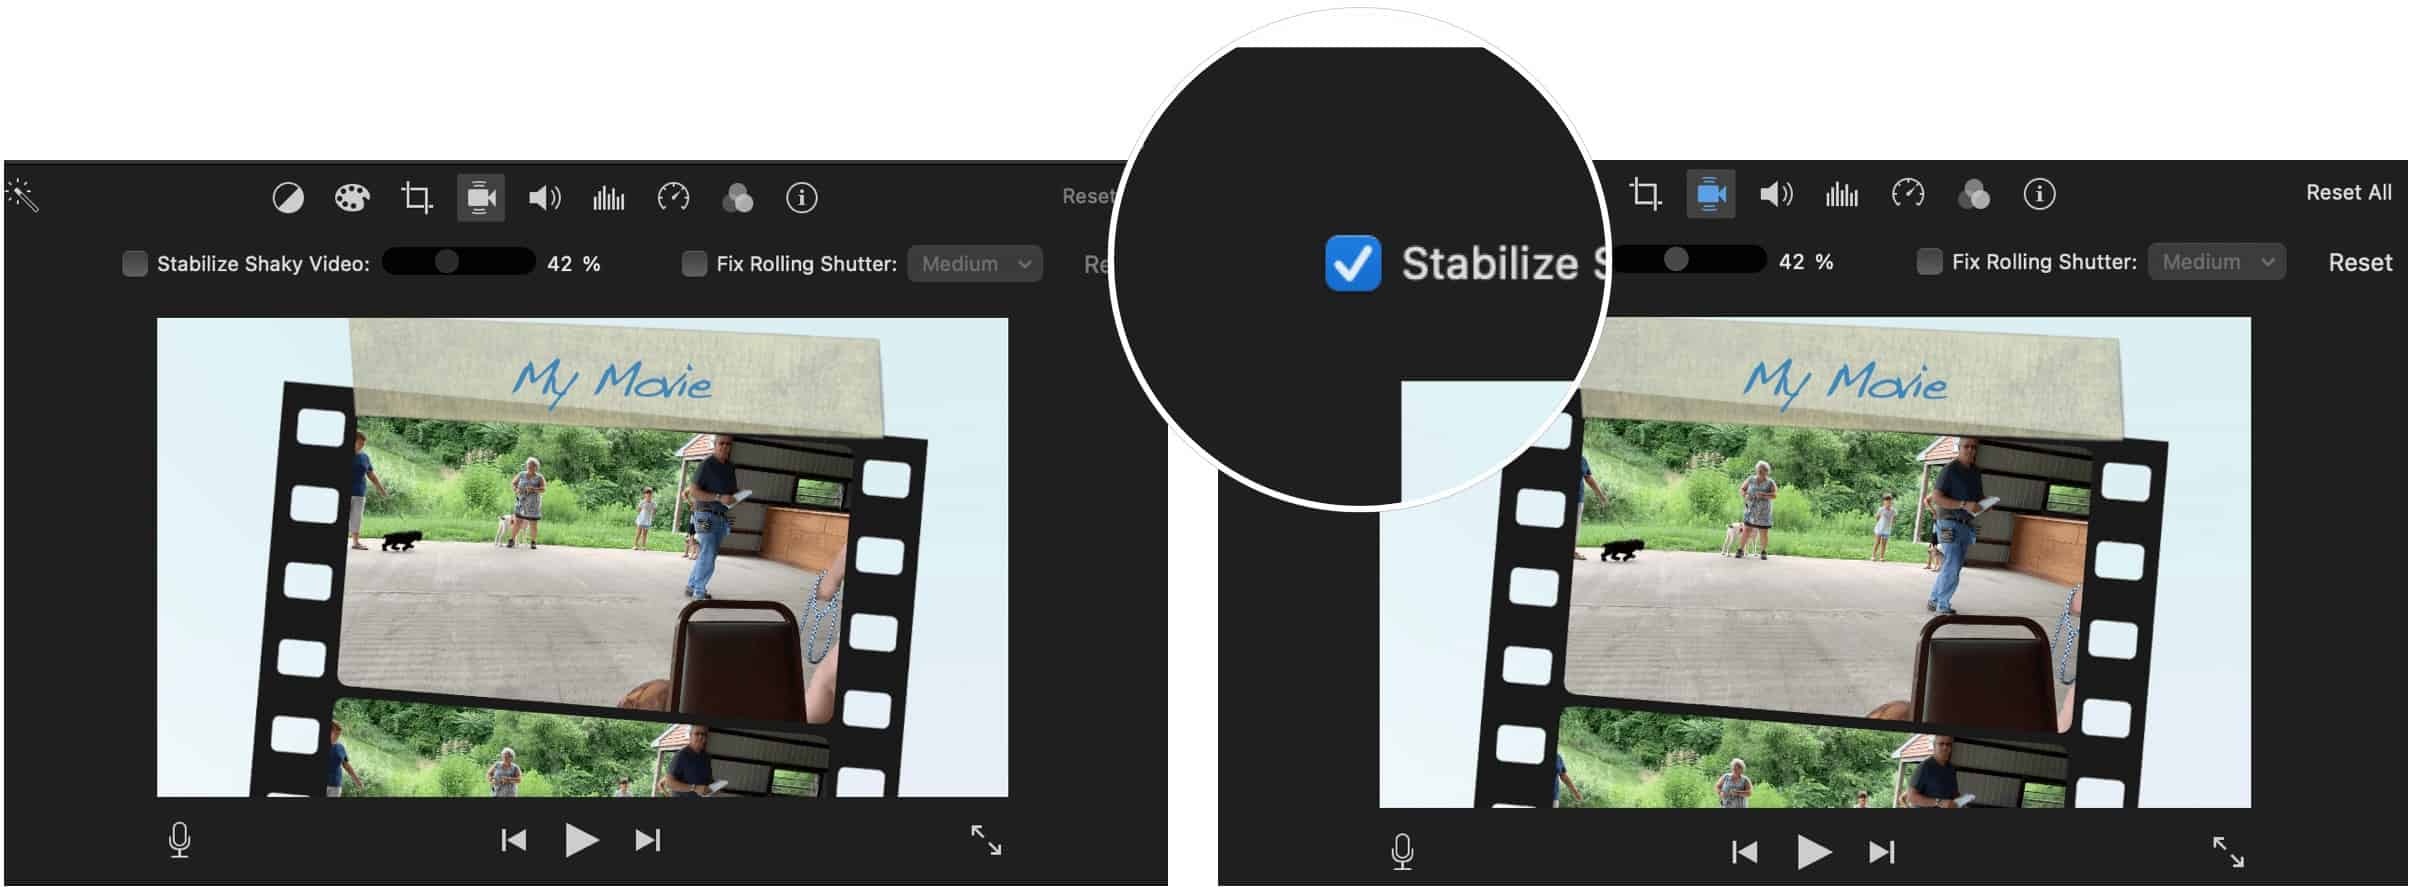
Editing Videos With iMovie: Fix Camera Shake Tool
No matter how good cameras get, shakes still happen. Luckily, iMovie has a tool for that! To steady a clip:
Change the Look
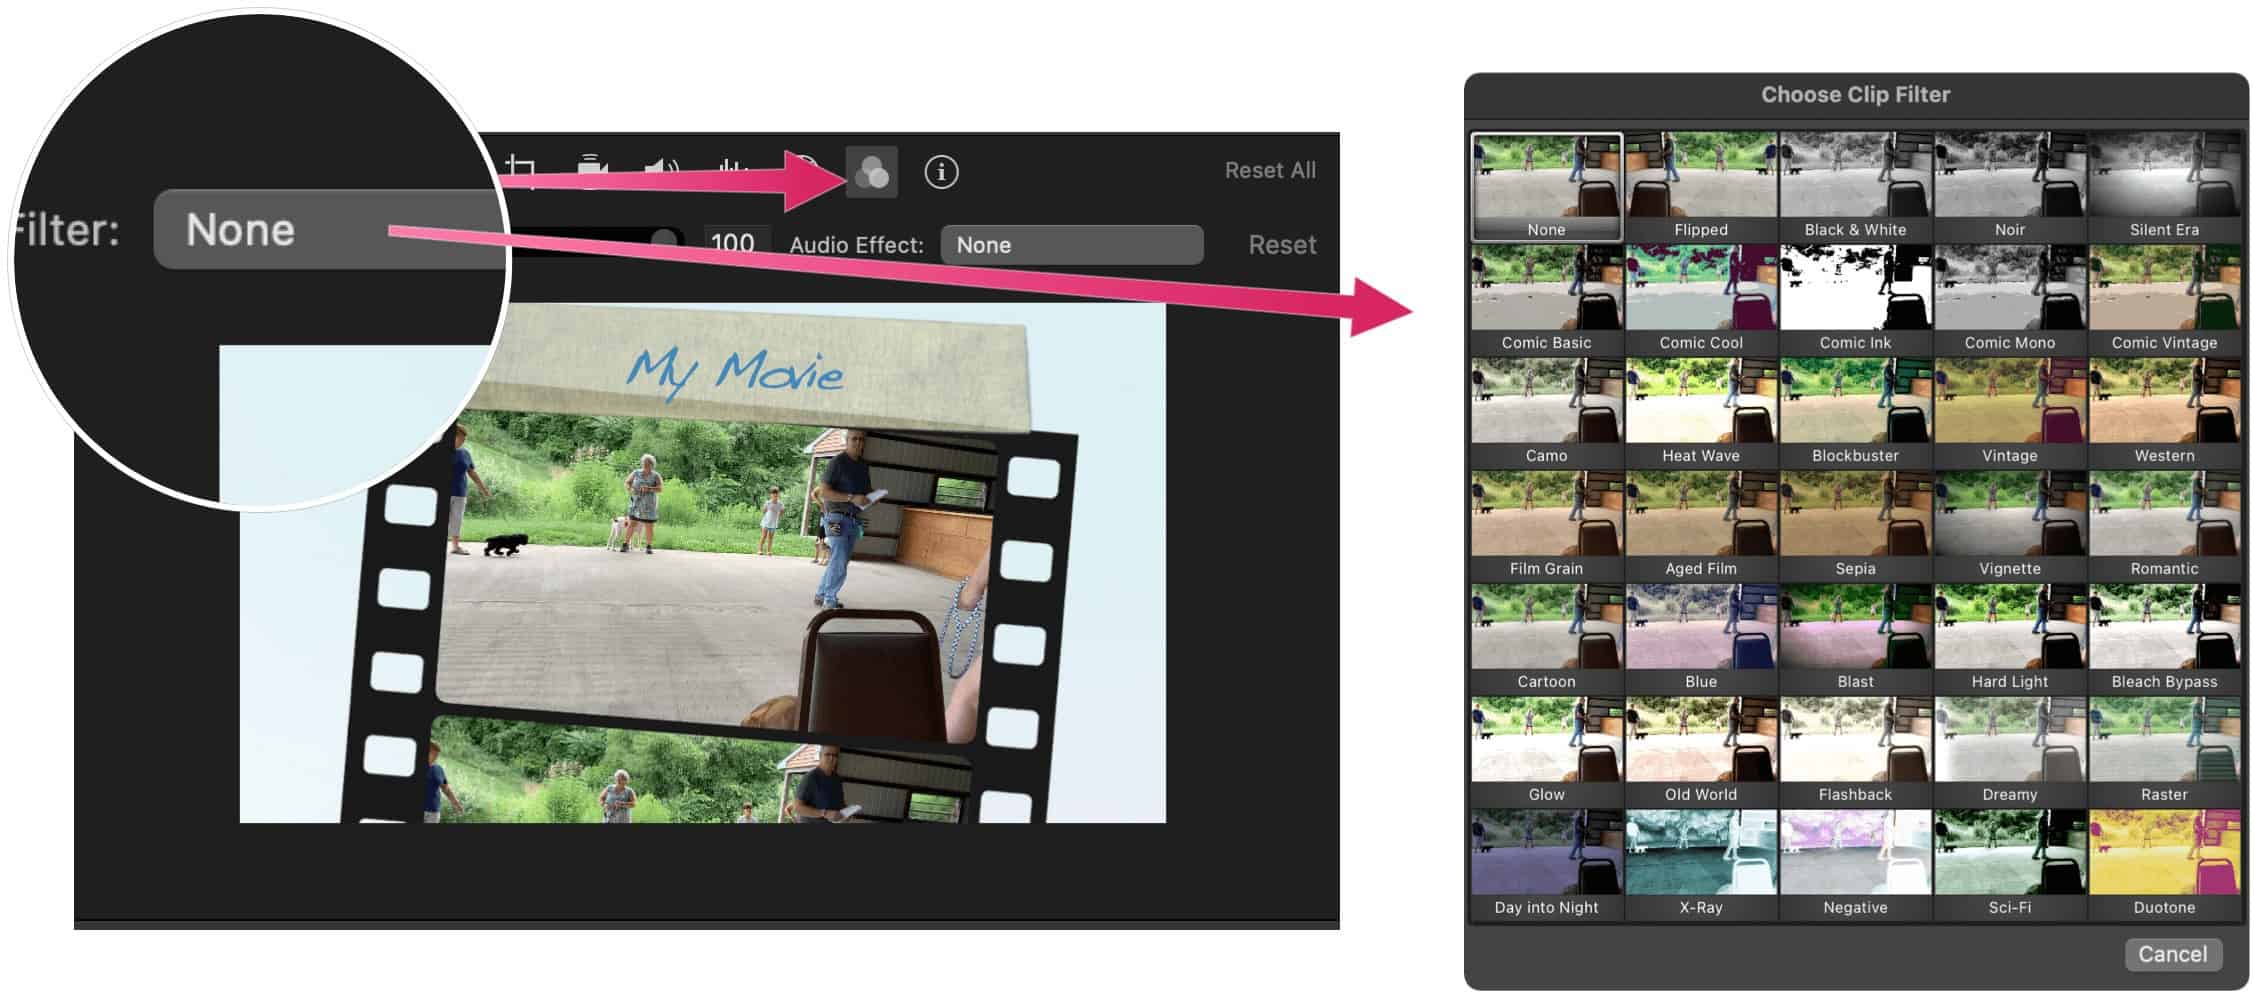
To further tweak your video, you can change its look by adjusting its color balance or color correction. You can also use the filter buttons above the Edit section to make manual adjustments. To use the color balance tool:
Meanwhile, the built-in color correction tools make it possible to make the clips look as natural as possible. The color correction button is to the right of the color balance button. To add filters:
Add a Title
If you prefer, you can add titles to your video. You can add these between and over the clips. To add a title:
Editing Videos With iMovie: Adjust a Clip
We’ve saved the best for last. You can adjust a clip within the timeline. To do so:
With iMovie, you can create movies and trailers in just a few steps. Use filters, different color combinations, and much more to make the finished product special. The steps above should be a good starting point for you to begin creating a digital masterpiece. Enjoy! Comment Name * Email *
Δ Save my name and email and send me emails as new comments are made to this post.


![]()
