Add Outlook.com to Android Using POP3
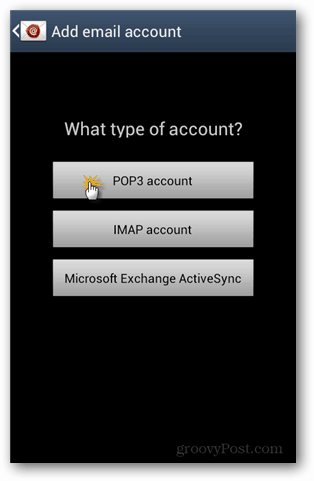
Open the default Android email app. Select the option to add a new account, or if it’s your first time using the app, you’ll be prompted to set up an email right away. Enter in your full Outlook.com email address and password, then press Next. On the next screen, select the “POP3 account” button. Currently, Outlook.com doesn’t support IMAP.
Now configure Incoming and Outgoing server settings. Note that for both settings, you need to leave the username and password the same. Just make sure the username is the full email address @outlook.com.
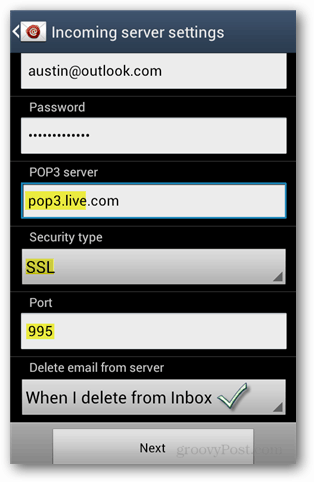
Incoming server settings:
POP3 server: pop3.live.comSecurity type: SSLPort: 995Delete Email from server: This setting is optional; set whether you want emails deleted only from your phone or the entire account (server).
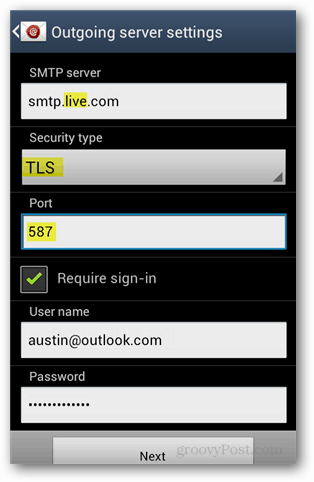
Outgoing server settings
SMTP server: smtp.live.comSecurity type: TLSPort: 587Require sign-in: Yes
I’m not really sure why the Outlook.com team hasn’t set up its own mail servers, but the live.com addresses work just fine.
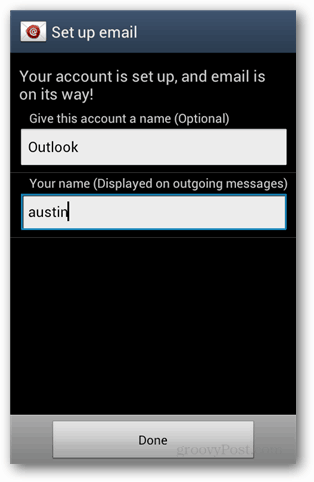
Next, configure how often the email app will check for new messages. I suggest setting this at either two or four hours; if you need to check mail more often, you can manually refresh. I’ve found that when the email frequency is set to a quick interval, it drains a lot of battery juice from the phone. The last thing to do is to give the account a local nickname. You only see this on your phone. And then add your name in the second box, and note this name may be seen by the people you email.
Check it out. Now you have Outlook.com email set up on your Android phone using the default email client. Outlook.com emails can also be synced up using Exchange ActiveSync [guide here]. Whatever way you use it, I think an @Outlook email address sounds more professional than Hotmail, Yahoo, Live, or other free services out there.
Sign into your outlook.com email account. Click the Gear icon in the upper right corner next to your name. Select “Options”. Under “Managing your account”, click “Connect devices and apps with POP”. Enable “POP” and select your “Deleting downloaded messages” option. Click “Save”. Now the POP setting at… https://www.groovypost.com/howto/pop3-outlook-com-android-email-setup/ will work. Comment Name * Email *
Δ Save my name and email and send me emails as new comments are made to this post.


![]()
